

MY LONGEST COLLAGE


Recently, I completed my longest collage yet. It’s 1 metre long and double sided. The catalyst for this project was finding a concertina booklet I had made at my university bindery.
Around the same time, I was doing a lot of negative filtering. Negative filtering is a cognitive distortion where an individual focuses primarily on, and selectively recalls, negative aspects of a situation while disregarding or minimising the positive elements.
To counteract this, I decided to create a visual narrative highlighting the good things that have happened over the past 10 years. I printed photos from each year and incorporated writing from my journals.

Here's a list of materials and steps to help you create your own:
Materials Needed:
Concertina Notebook: You can buy one or make your own by following tutorials like this one.
Different Paper Stocks: Use various paper textures to add interest.
Photos from Each Year: Include highlights or even lowlights.
Quotes from Journals: Extract words or events that capture each year.
Glue and Double-Sided Tape: Essential for assembling your collage.
Watercolour Collage Shapes and Tissue Paper: For added visual elements and textures.

Step-by-Step Guide:
Prepare Your Materials:
Gather all necessary materials listed above.
Print your photos and journal quotes, ensuring they are ready for assembly.
Assemble the Concertina Booklet:
If you are making your own concertina booklet, follow a tutorial to create it. Ensure it is sturdy enough to support your collage.
Plan Your Layout:
Before gluing anything down, plan the layout of your photos, quotes, and other elements. Decide how you want to arrange them to tell your story.
Adhere Photos and Quotes:
Use glue or double-sided tape to attach your photos and journal quotes to the concertina booklet. Mix different paper stocks for added texture.
Add Decorative Elements:
Incorporate watercolour shapes, tissue paper, and any other decorative elements to enhance the visual appeal of your collage.
Review and Finalize:
Once everything is in place, review your collage for any adjustments. Ensure all elements are securely attached.

PRESSING THROUGH CREATIVE BLOCK
Developing mixed media skills is full of experimentation. Along the way, not every piece will turn out as planned. Colour combinations might clash, and visual hierarchies can be off. When this happens, a bit of perseverance can turn a seemingly failed piece into something entirely new.
One solution I have found helpful, is to cut up the ‘unsuccessful’ artwork into shapes for collaging. This approach can breathe new life into a piece that initially felt like a misstep. For instance, my original blue mixed media piece did not work as a whole, but I was then able to cut it up into leaves and circles for a collage.

I then found that the collage wasn’t working either. The cut pieces were set aside in an envelope. They ended up staying there for months. When I revisited these collage pieces I decided to repurpose them into a tiny book. I ended up with a totally different outcome than what I had set out to create. This project taught me to be patient and nimble with the creative process.


Key learnings:
Stick it out: Persistence is key. Instead of discarding the artwork at the first sign of trouble, pushing through can lead to a satisfying outcome.
Change it up: Incorporating various art forms and working with different sizes, such as moving from A5 to tiny squares, can invigorate the creative process.
Take a break: Stepping away from a project and returning with fresh eyes can provide new insights and help see the project through to completion.


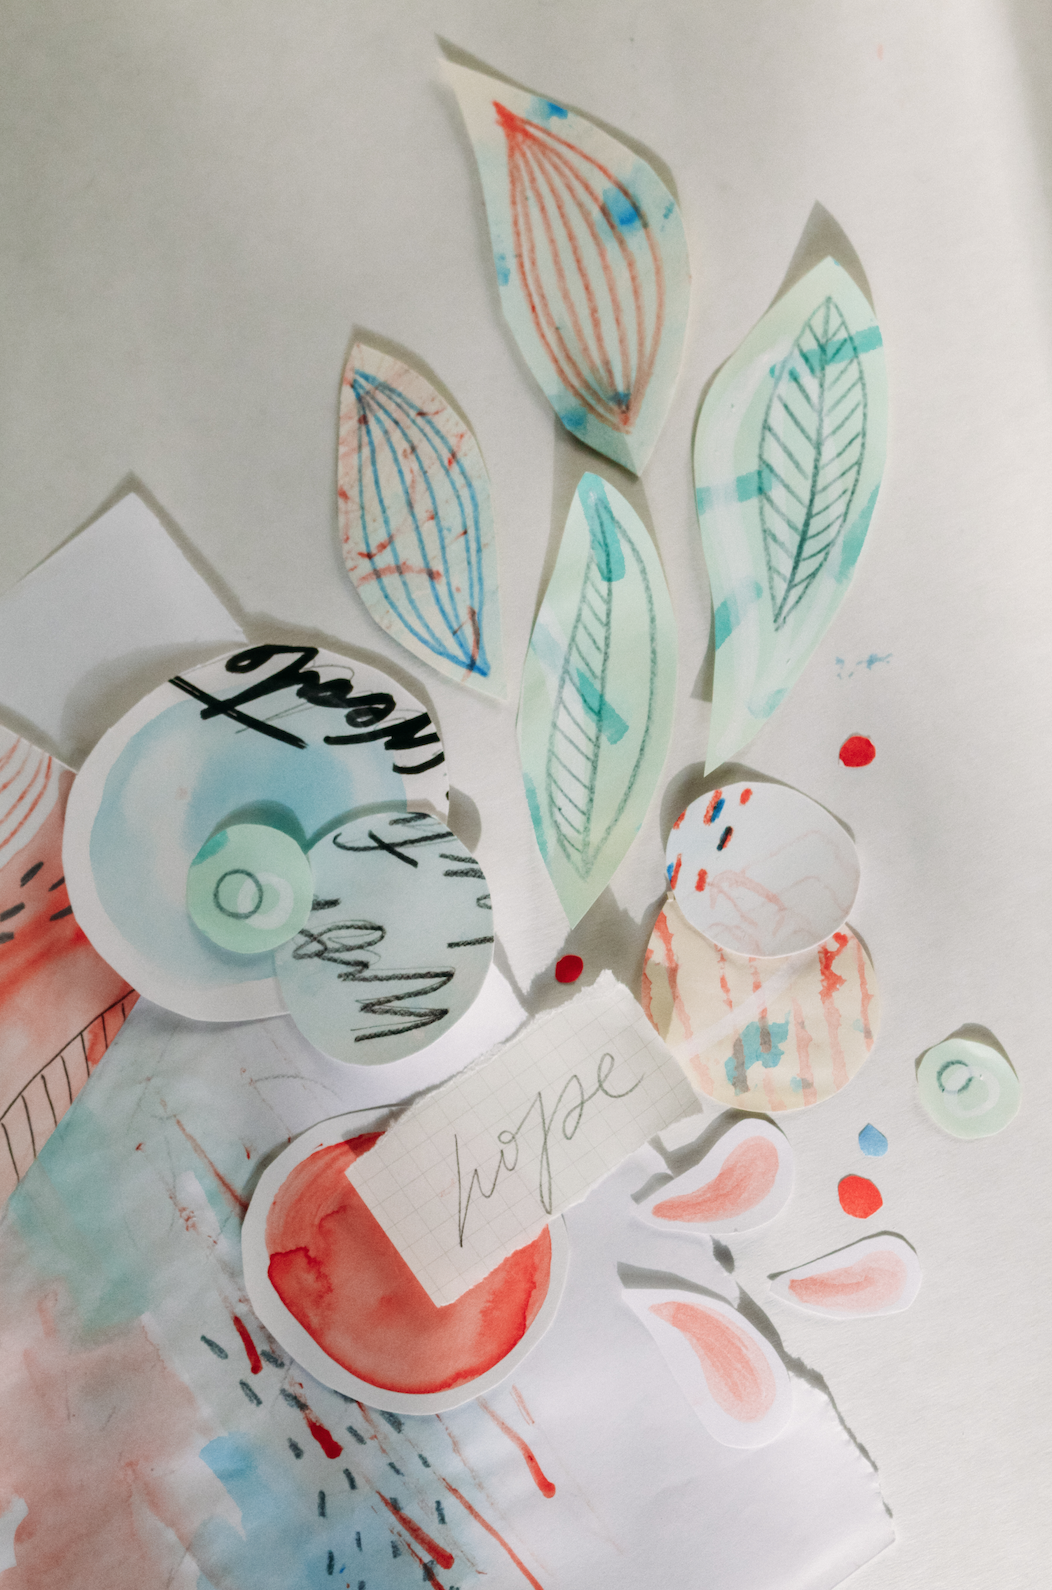
MIXED MEDIA
Last lockdown I completed a mixed media course with Laura Horn. It was an afternoon of messy paints, unexpected textures and satisfying outcomes.
This art process is for all the minimalists out there (haha). You can use absolutely anything from forks to old credit cards to experiment with mark-making. I used a combination of watercolour, acrylic paint, coloured pencil and paint pens. I chose colour palette made up of two main colours; teal and orange.
The first step is to create the papers you are going to work with. This involves using different paper stocks and layering with your chosen materials and mark-making tools.


Once these have dried, cut out shapes to collage with. Ensure there are a range of sizes to help keep your compositions dynamic. I like working with circles and leaf shapes. You can bring in extra materials like coloured paper and tissue paper.

I didn’t end up sticking the final collages down but used photography to capture a layout. I added in a few of my favourite words as well…


PROJECT UPDATE #2
Writing and designing a book in 12 weeks sure isn’t easy. Thankfully, as explained in the last update, I’m working with a topic I am passionate about which makes it all worth it. Since the last post I have:
A) Refined my project question
My readjusted project question effectively incorporates the role of my design outcome and what it seeks to address.
Promoting awareness: One of my hypotheses was that social design in Aotearoa is not yet widely acknowledged or documented. This is both a problem but also a gap/opportunity.
Inspire engagement: I am aiming to highlight the value of social design and therefore encourage designers to get onboard.
My design outcome or product therefore acts as a vehicle to inform designers and the wider public, provoke thought and influence behaviour. It allows designers to contribute to this discussion as leaders in this field of design.

B) Done a project proposal and presentation
This involved mood-boarding and writing up a project description, explaining the relevance of the topic and creating a self directed calendar. Not only did this give me a clearer idea of the purpose of the publication, the content and the target audience, but it has also enabled me to establish a visual style.
Project purpose: This project aims to create an editorial publication which showcases New Zealand creatives using art and design to generate social change. The publication sets out to highlight that design is a powerful force which can initiate social good.
Target audience: My primary target audience will be upcoming design students. This project will serve as a fitting reminder for my generation that designers and artists are indeed makers of change.


C) Explored imagery, typefaces and handmade elements
I will be seeing how these handmade elements could be incorporated into my spreads.
A few things to keep in mind:
ensuring pages to not appear too text heavy
seeing whether my chosen typefaces work alongside hand-lettered type
deciding whether to vectorise the lettering (creates a smooth aesthetic) or leave it organic (more interest in the letterforms)


D) Read, read, read and read some more
To begin my weekday mornings I have been reading through a collection of books on social design and social issues in Aotearoa. Here are a few standout readings:
Precarity: Uncertain, Insecure and Unequal lives in Aotearoa New Zealand edited by Shioh Groot.
Pursuing social justice in New Zealand: 14 New Zealanders share their stories of communities helping people in ways government cannot. Maxim Institute.
Publications by Auckland Co-Design Lab (big fan of their mahi!)
Idealog: Re-imagining a better world
Wealth inequality was a key theme running through the books. Groot (2017) explained, “We live in a society skewed in favour of those with extensive wealth, where attention is diverted away from an examination of inequalities by vilifying those who bear the greatest burden of a broken system.” Another reoccurring theme was the push to take responsibility. This involves not seeing social issues as the oppressed persons individual fault or the governments job but being aware that we all have a part to play. My publication can encourage designers to understand their role and responsibility.

E) Interviewing the experts
Despite Level Three lockdown I managed to get underway with the interview process this week. Chatting with NZ-based social innovators is providing plenty of insight and inspiration. Top quotes from the interview:
(In NZ) We have a huge gap between those who are thriving and those who aren’t.
Co-Design is really important for social design projects so that the people who are affected by and issue absolutely need to be working on the problem.
Designers have an ethical responsibility to consider what might be the implications of design outcomes or solutions.
I have a deeper appreciation for the value of first-hand information. It feels as though my publication will hold fresh perspectives and insights that have not been shared in this manner before.


PROJECT PLANNING
After three years of studying design, and a lot of trial and error, I’ve found a planning system that works for me. We often work on multiple projects at once. Getting the tasks out of my head helps prevent overwhelm. I use a physical journal for events but I find digital planning works better for uni.
Use iCloud notes as it syncs to phone and laptop
Use the checklist feature
Create a title for each week
Write in due dates in a different colour
List weekly tasks in order to reach deadlines. In brackets write which day you will do them with a set amount of time (this saves you from spending too much time on one task = extra stress)
The image below is not the perfect example (it’s not in order as it is a completed list). However, it should give you some idea of what I’m describing. We’re all different so it may take a bit of experimentation to find what works for you.


PROJECT UPDATE #1
The reality that I have just one semester left of my degree hasn’t sunk in. My classmates and I will be tackling our final project. Huge amounts of time, creativity and effort will be poured into one assignment. We will also have an exhibition to organise. It’s tricky to find time for personal projects. However, I thought I would share blog posts for my uni project on this site too. I normally have a separate blog but some of you might want to follow along. (It might be a bit of a recount e.g. “I did this, then this” as we have to document our process but hopefully you gain some insight from it).
To put it simply my project is based around social change in Aotearoa. Over the past three years, I’ve developed a growing passion for social design. Here’s a good old Wikipedia definition:
“Social design is the application of design methodologies in order to tackle complex human issues, placing the social issues as the priority. Historically social design has been mindful of the designer's role and responsibility in society, and of the use of the design process to bring about social change.”
Previously I viewed my passion for design and desire for social justice as two separate entities. I was delighted to learn that there is a whole field of design which merges these two interests.

Ideating back in April - trying to think about personal design style
Inspiration Session
Today I’ve kicked off the semester by delving into my collection of papers and publications. This involved two key tasks: creating a physical mood-board and analysing publication styles and designs. (The dog tried to be of some assistance).


Moodboard
This corkboard will sit in my room for the rest of this year – in a spot where I can always see it. There is still plenty of space to add colours, textures, imagery and type ideas as the weeks go by. I already have a clear idea of the aesthetic I am going for and the rationale behind it. Visual cues naturally stem from the topics a project addresses. For this reason I have been drawing ideas from Aotearoa: the culture and the landscape. Dulux ‘Colours of New Zealand’ has been of particular interest.


Publication Analysis
Over the years I have grown quite the collection of design journals and magazines. A few standout ones include Here Architecture Magazine, Sceen’ry Magazine (their website is incredible too) and Stemme; a publication by AUT graduates. I photographed layouts and made annotations on their effectiveness and ideas I could incorporate into my project.


CONFIDENCE

After watching an episode of Marie Kondo, I once again found myself sorting through piles, papers and folders. Amongst school photos and cover-sealed workbooks, I discovered some of my earlier artworks. A rather flattering self portrait made me smile. Crayon flowers, wonky felt tip people and watercolour paintings covered the pages of my kindy book. I stumbled across a picture of my first ‘art exhibition.’ There I was sitting proudly in front of my flower starfish - such confidence.
Within Design Thinking, creative confidence is described as “the belief that everyone is creative, and that creativity isn’t the capacity to draw or compose or sculpt, but a way of understanding the world” (IDEO,2018) This concept is relevant to any project and applies to all industries.
David Kelley stated that…
“Creative confidence is the notion that you have big ideas, and that you have the ability to act on them.”


Here are a few thoughts to consider:
Do you feel your ideas have value?
In what ways could creative confidence improve your self esteem?
How would this impact the work you are involved in?
Do you struggle with comparison or imposter syndrome? How could confidence help you overcome these struggles?

I’ve also written about this topic in a previous blog post: I’m not creative
Other resources…
VIDEO: DAVID KELLEY How to Build Your Creative Confidence
BOOK : Creative Confidence by Tom & David Kelley

LIFE AS A DESIGN STUDENT
With studio style workspaces, bindery workshops and an absence of exams, design is clearly a unique university degree. My week to week varies depending on the projects I’m working on at the time. There are lectures, critiques, presentations, group projects and individual assignments to keep us (very) busy.
Rather than memorising technical terms or complex equations, I’ve found design to be more like exercising a muscle. The design process takes practise and determination. It starts with unpacking the brief, then ideation, concepts, thorough research, development and then at last - the final outcome. Learning to create and ideate within a short time frame is another key skill I’ve had to acquire. Being thrown in the deep end, facing multiple creative blocks, going back to the drawing board yet again… it certainly hasn’t always been smooth sailing. Now that I am in my final year I’m feeling far more confident about how to handle the uni lifestyle.
Routines I try to keep in place while studying:
Daily:
Devotional Time
Exercise!
Working on assignments
Weekly:
An hour or two for personal projects
Something social
A rest day


SUMMER PROJECTS
There are several reasons to love summer: warm weather, long holidays, family time…
Summer finally gives me the opportunity to create, unaccompanied by the pressure of deadlines. To make, just for the sake of making, without distractions and time restraints.
The stage and season of life we’re in impacts our capacity for creativity. Burnout and tiredness often hinders. It’s interesting to note that negative circumstances can still be an excellent source of creative inspiration. A balanced lifestyle can preserve time and fuel energy for passion projects.
Below are a few small projects I worked on these past few months.

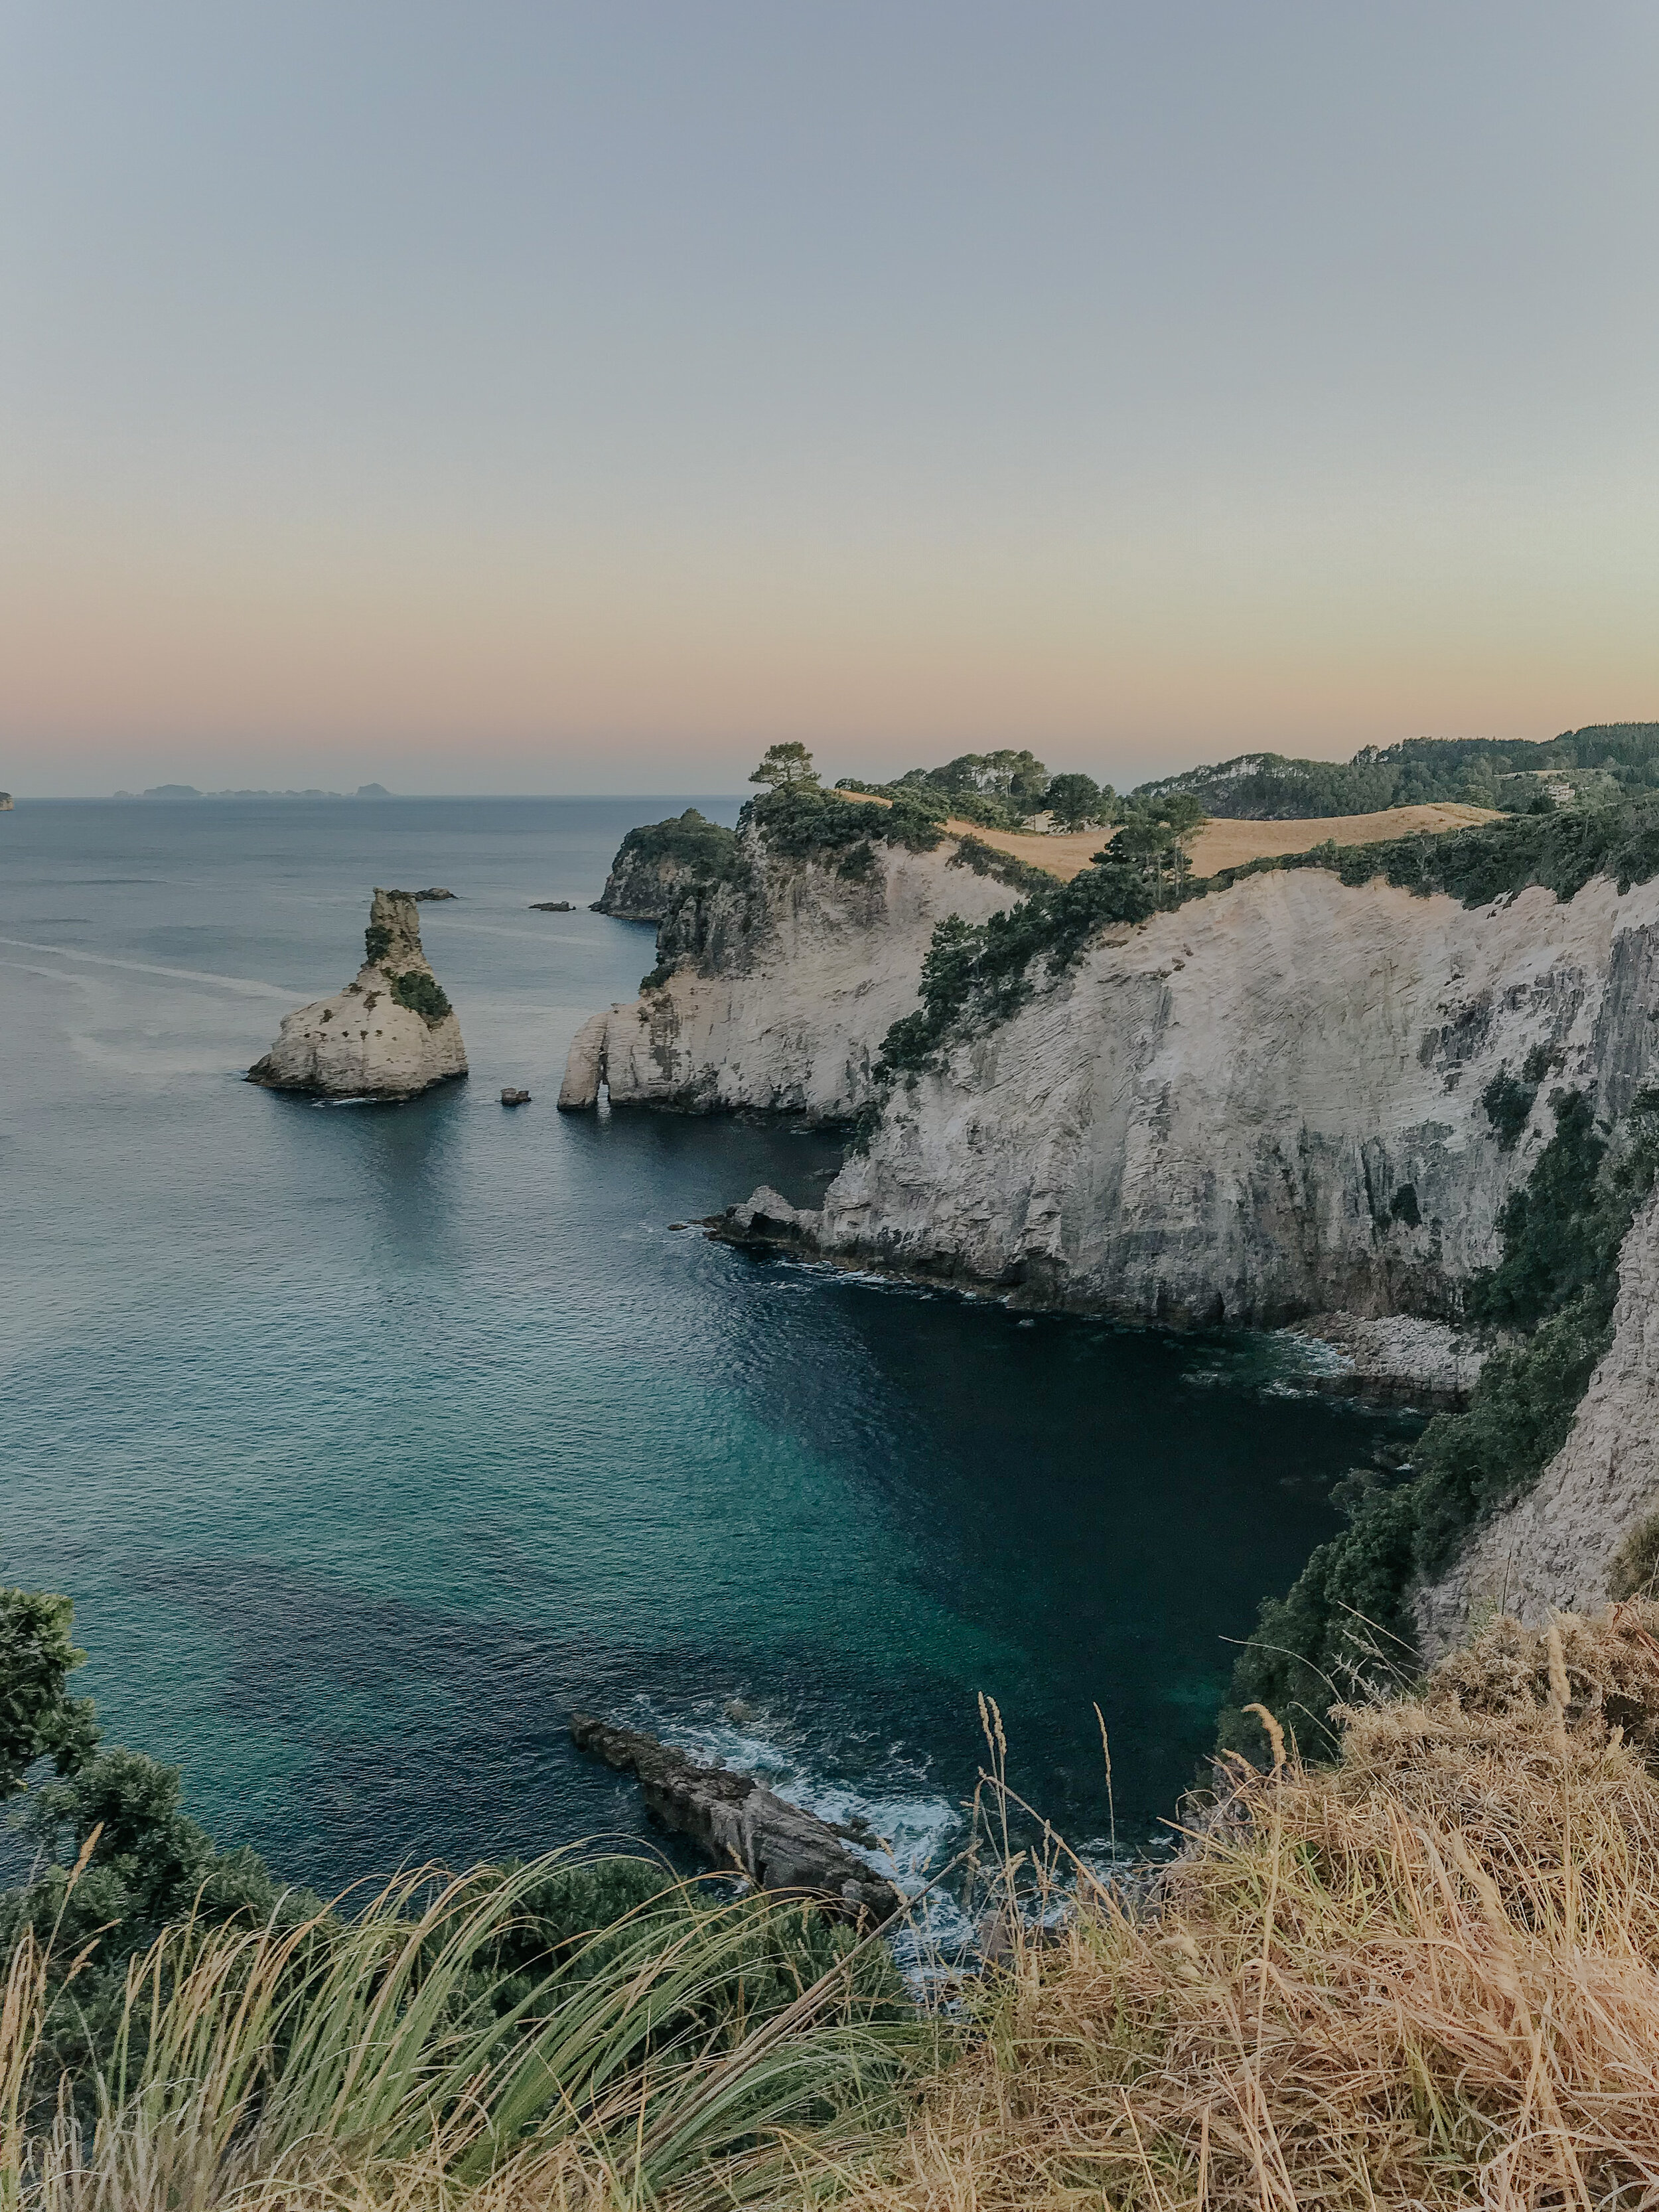
HOLIDAY IG STORIES
I enjoyed experimenting with the UNFOLD app to capture the beauty of a New Zealand summer. It’s free to download though I have bought a few of the templates. This years adventures included photos from Northland (Ocean Beach and Tutukaka) and Coromandel (Hahei and Te Pare Point). I like to limit my social media time when I’m away. Because of this, I often design the story on the app, collect content over a few days and then upload it to Instagram in one go.

COLLAGE MORNINGS
This involved a mess of paper all over the bedroom floor and losing track of time = bliss.
I had collected interesting papers, type and images throughout the year so it was good to finally turn them into collages.
A few people have asked about my process so I might film or write a tutorial at some point.

WEEKLY CONTENT
Content creation has become one of my favourite forms of design. This summer I tried to make diverse and tactile posts; combining nature, hand-lettering and photography. My struggle has always been trying to incorporate the varying styles and creative mediums I enjoy working with into one feed. I am not a minimalist and I have never really been able to stick to a strict colour palette. That’s just the way it is (at this point anyways).
A few beautiful Instagram feeds:

REST GRAPHIC
A little design I did for a church newsletter. It includes photos from my trips to Tongariro, Wharekaho and Piha. The caption simply reads, ‘rest.’ To me, nature carries a clear sense of stillness and rest.
Very soon my personal projects will be put to one side as I dive back into university projects. I hope to share the process with you as I complete this final year of study.
Keep creating!
- L x


MELBOURNE
This vibrant metropolis was full of surprises: hidden arcades, street side eateries and creative architecture.
Top activities:
Eureka Skydeck : excellent views of Melbourne from the 88th floor.
State Library Victoria: definitely not your usual library!
Emporium mall: the shops go for miles.
Top food places:
Fonda Mexican : check out their website, I needn’t say more.
Manchester Press : the best bagel I’ve had all year, nice quiet location too.
Hardware Societe : enjoyed a delicious breakfast here on our last day.
Here’s a collection of interesting sights we spotted along the way…


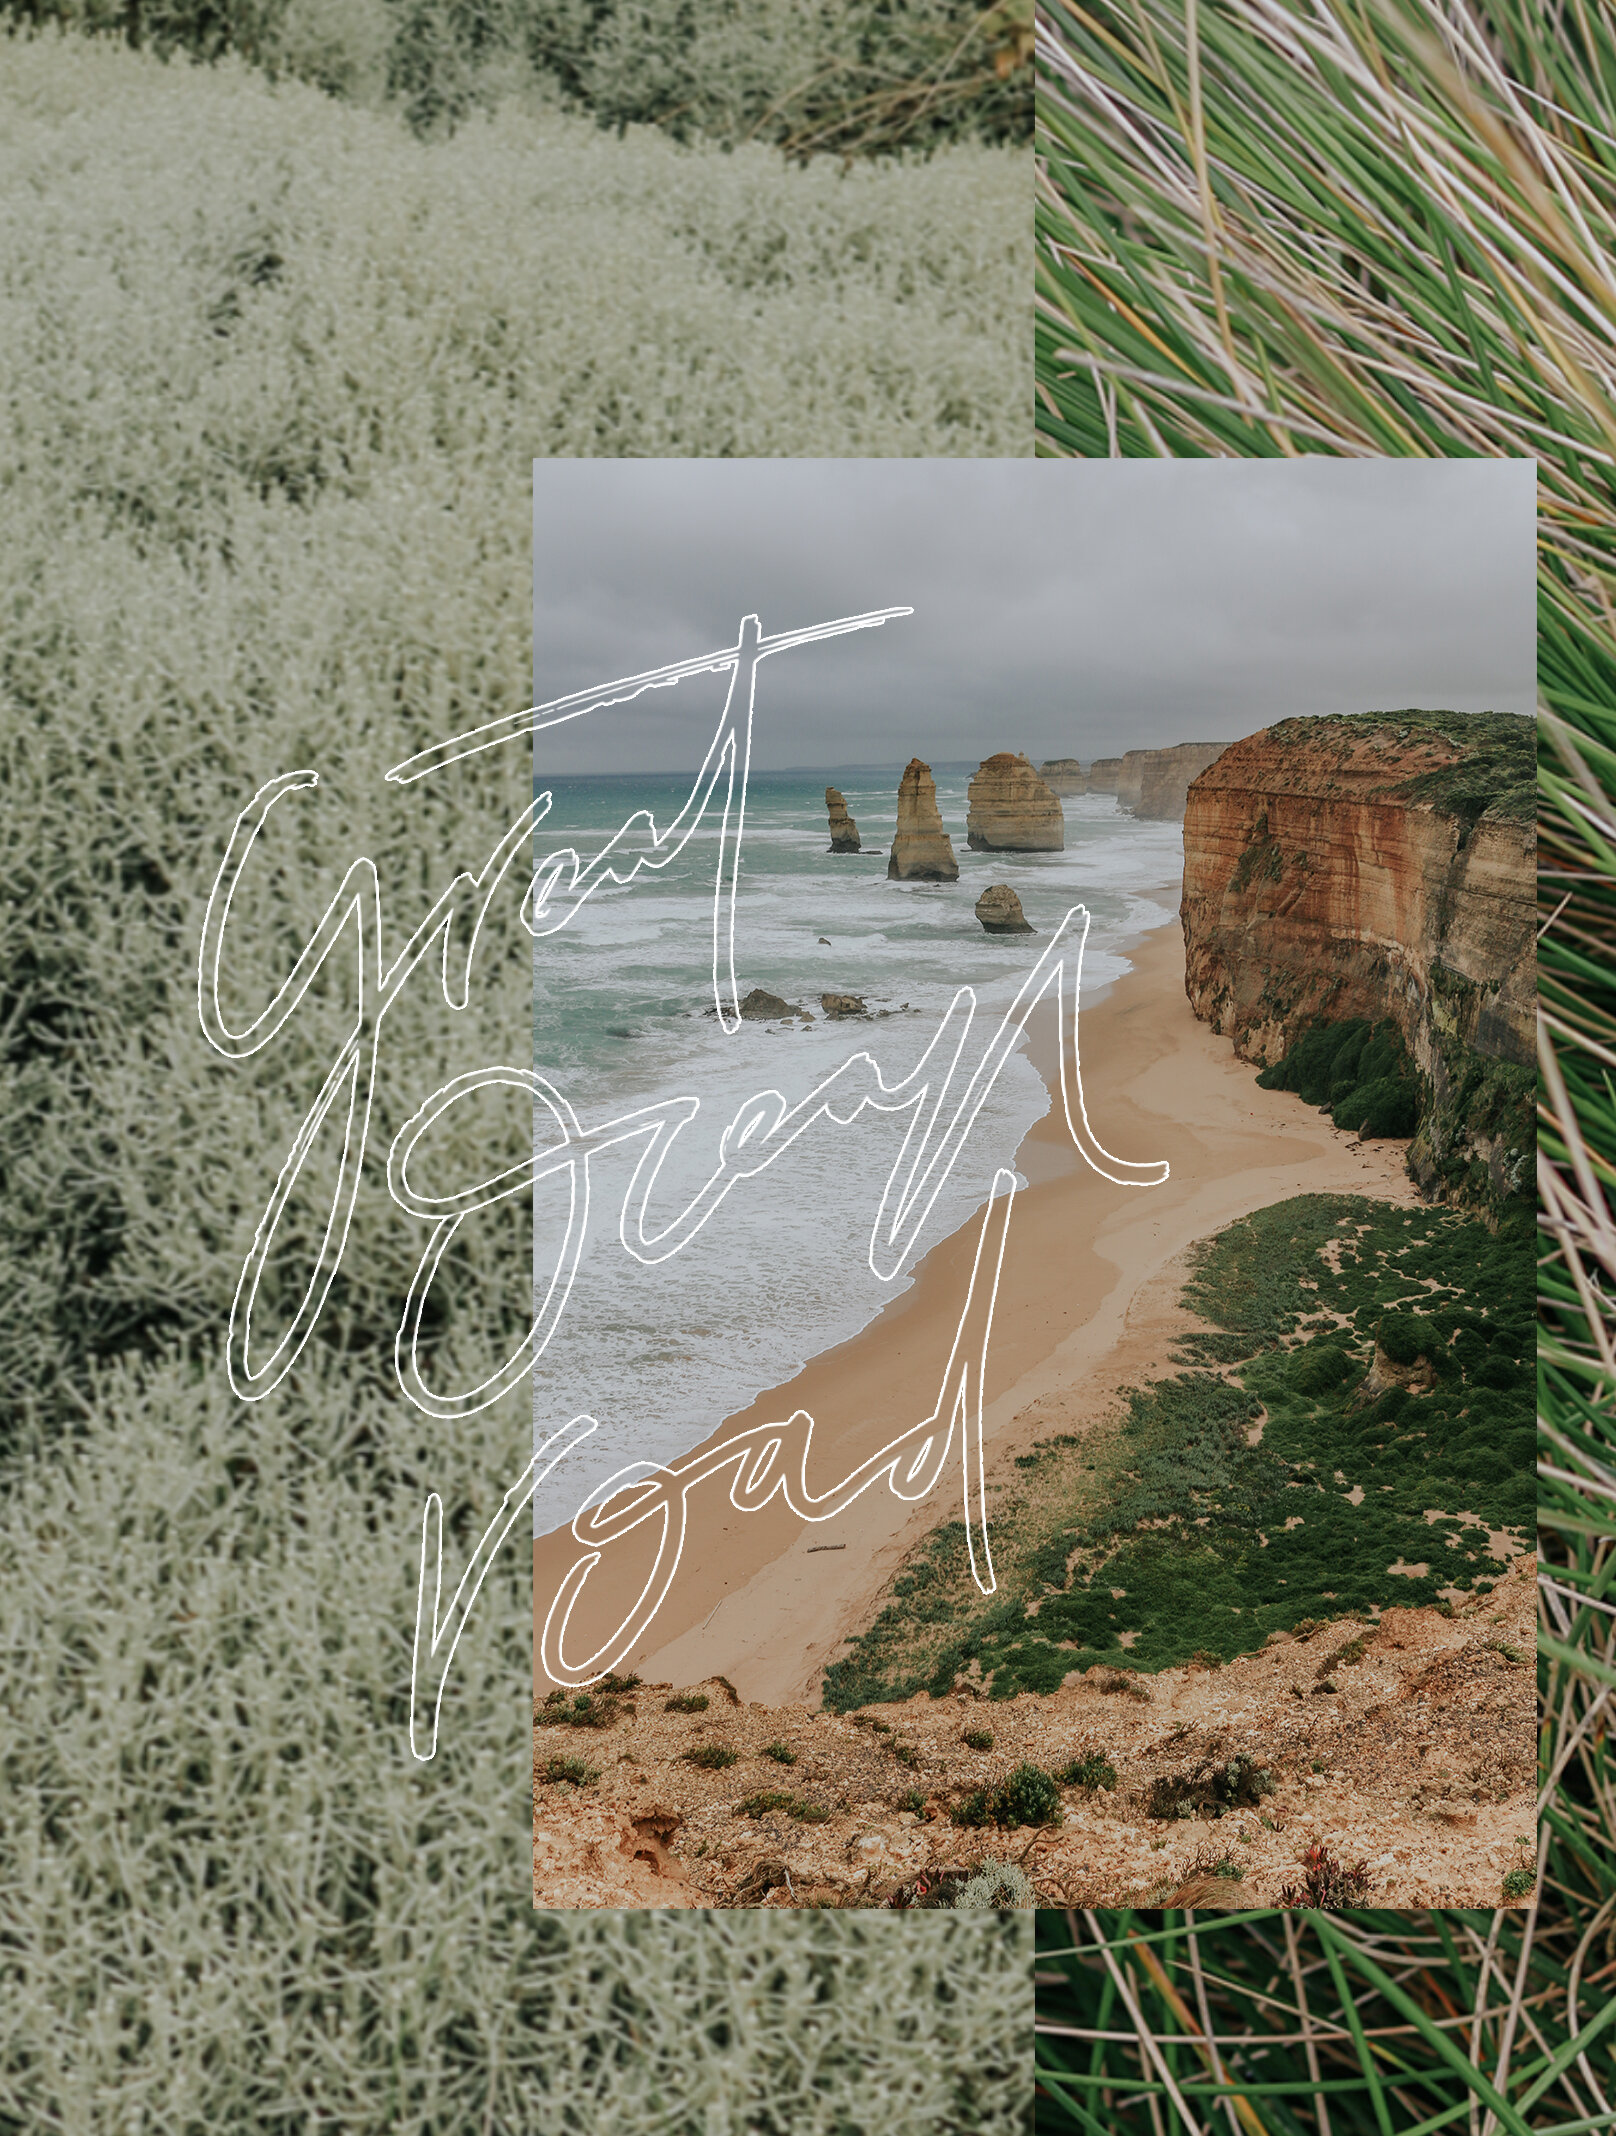
GREAT OCEAN ROAD
This day trip tracked along an incredible stretch of the Victorian coastline. A highlight would have to be the Twelve Apostles: limestone stacks scattered across the dramatic landscape. I hope this collage captures at least a glimpse of all the beauty we saw along the way…


PEN TO PAPER
‘Thoughts disentangle themselves when they pass through the lips and fingertips.’ - D. Trotman
We all have different ways of processing life. For me, this has always been through writing. Journalling has naturally become a part of my day to day life. I never set a goal to start journalling or intentionally went out of my way to make it a habit. It was an instinctive form of expression.
I have journals entries from when I was just eight years of age. These are now a source of entertainment as I wrote about the stresses of my year four homework or friendship drama due to a school camp.
I have a few types of journals:
1. Visual Personal Journal: I only started this one last year. Big blank A4 pages have proved to be a place where I can combine hand-lettering, doodling and writing. For some reason I still enjoy using a simple ballpoint pen for this.


2. Collage Journal : Purely for creativity, this A5 journal displays a range of magazine collage spreads. Keeping them all together in a book is far more satisfying than a pile of loose artworks.


3. Dream Journal: This book is very close to my heart. It holds articles that have inspired me, notes about people who have led honourable lives, along with design and social justice ideas for the future. Articulating your hopes and dreams proves to be highly motivating and empowering.


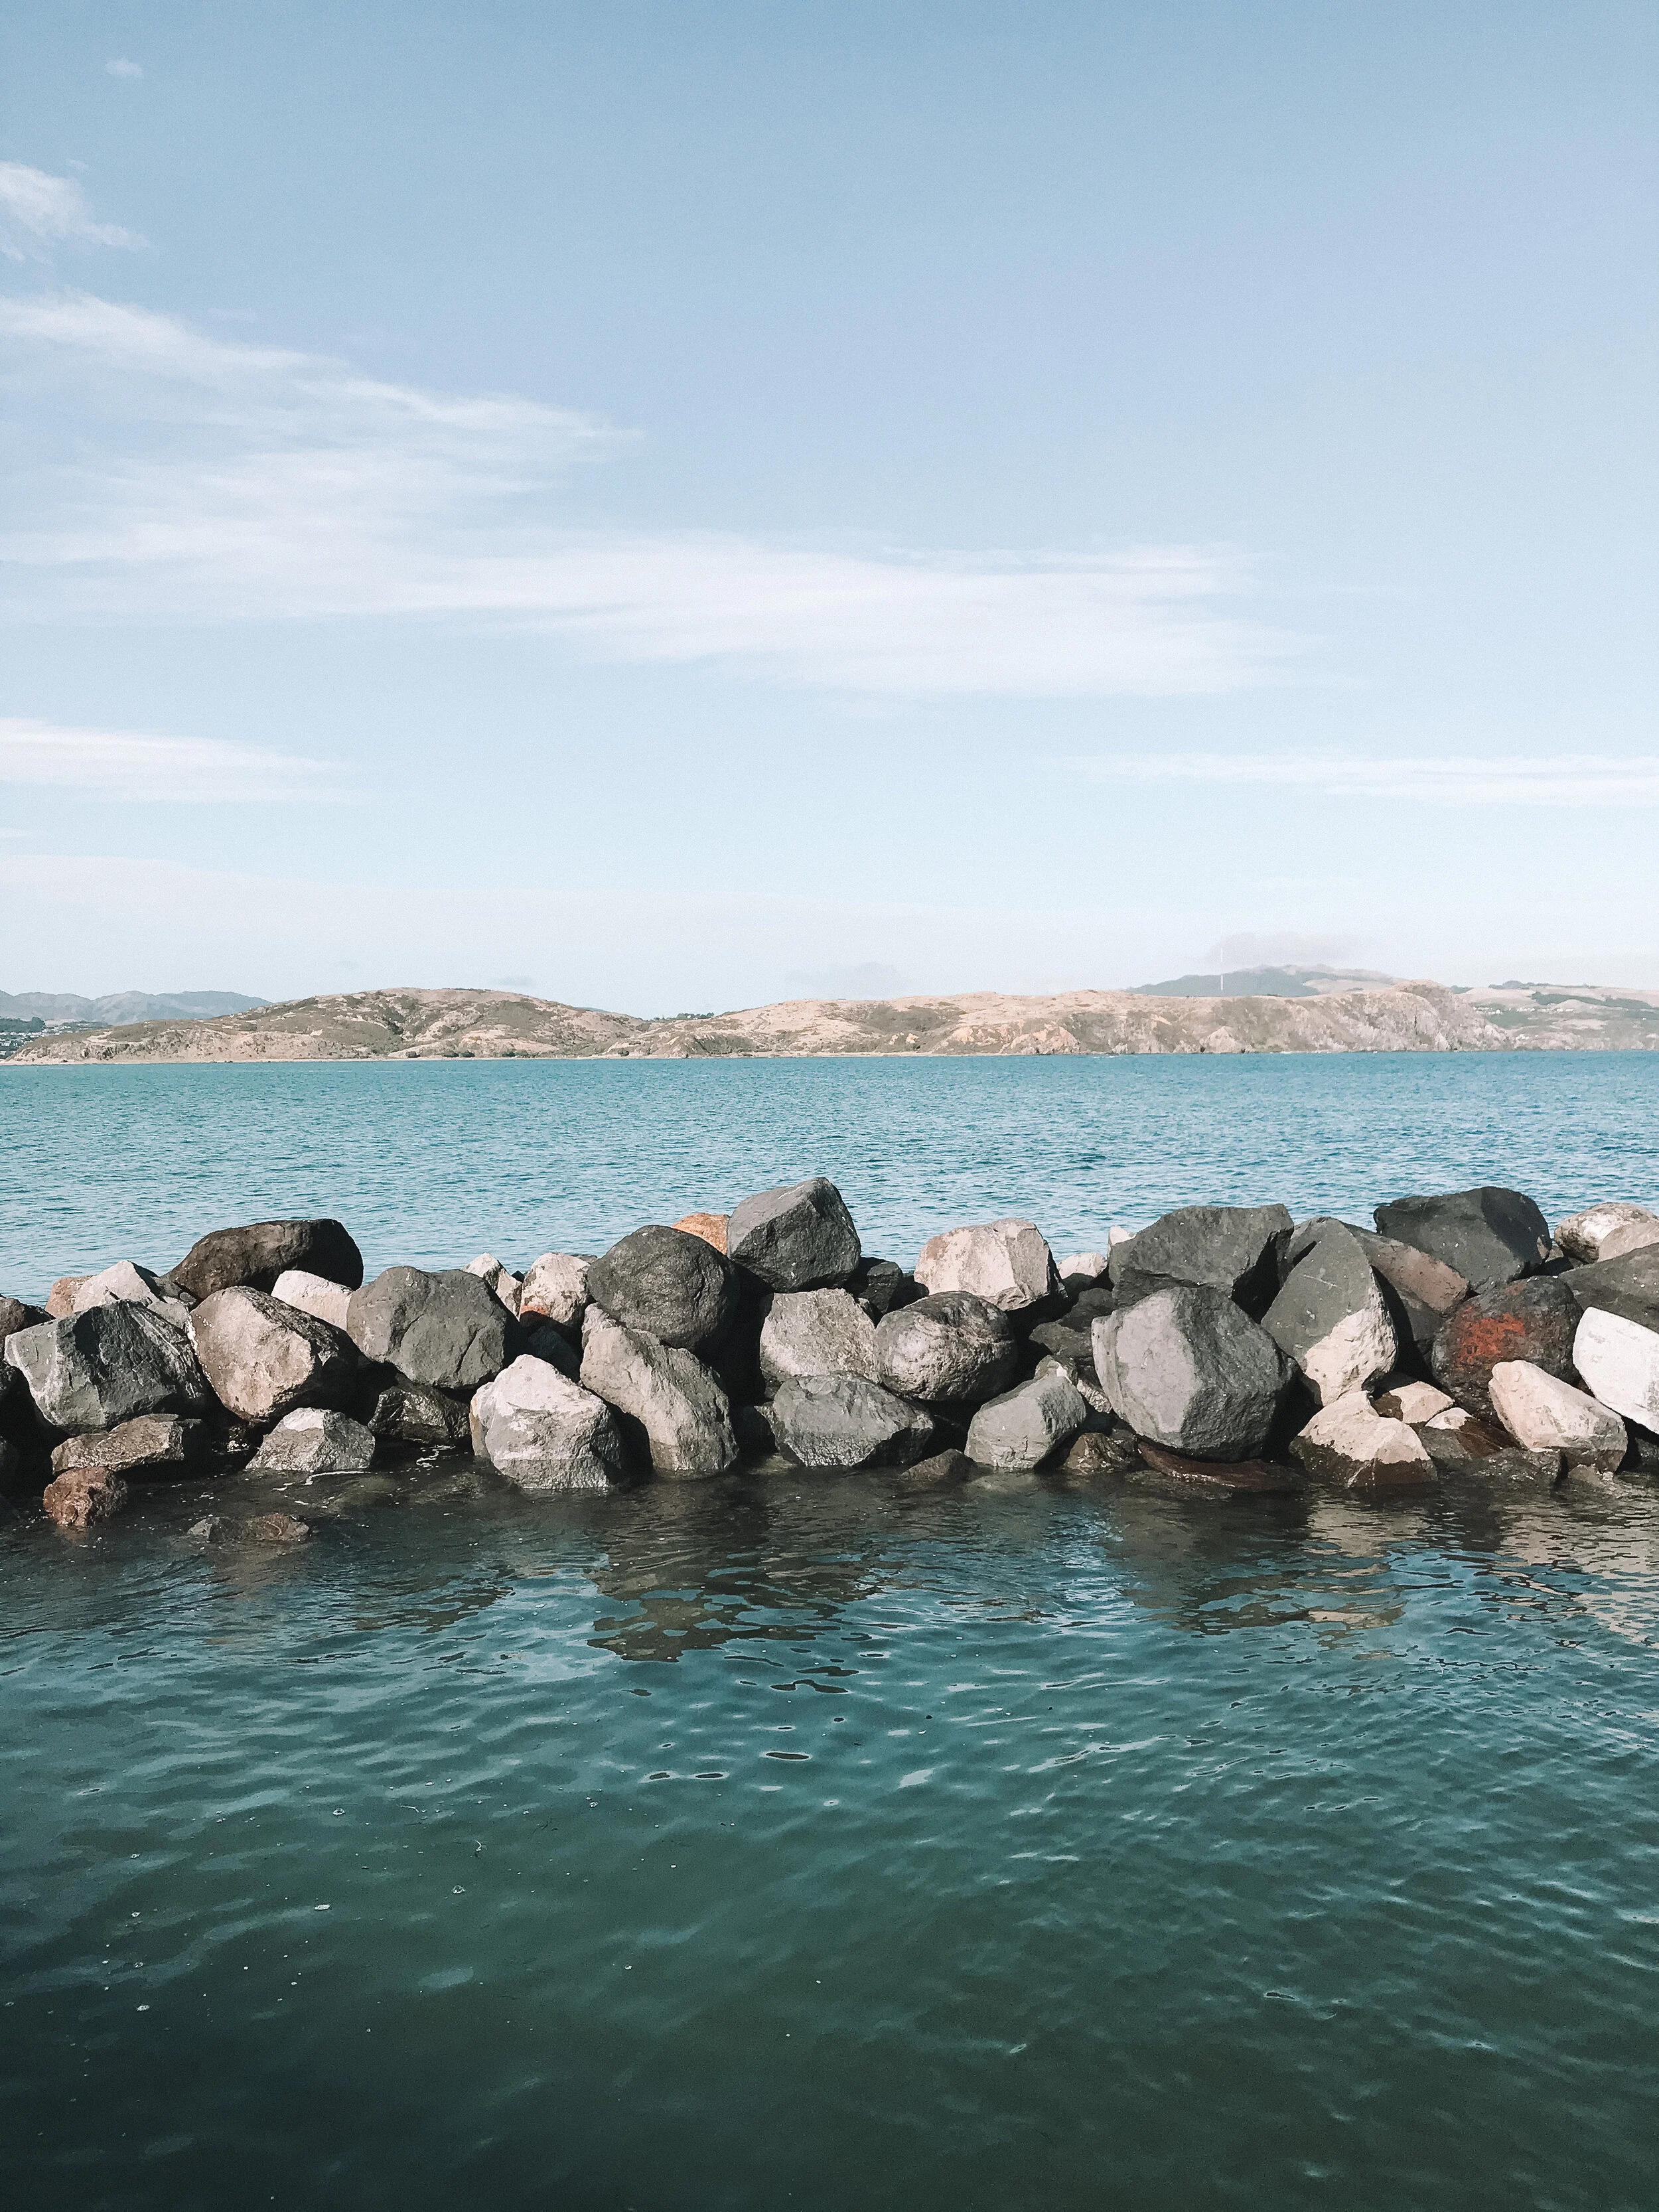
ISLAND HOPPING
A few months back we ventured over to Rangitoto Island. Here are a few snapshots that capture the surprisingly varied landscape:


